一、开通阿里云短信服务以及访问账号
1、如果初次打开阿里云短信服务,我们就可以看到“免费开通”的按钮:

2、阿里云也很贴心地告诉我们,实现短信分为四步走:

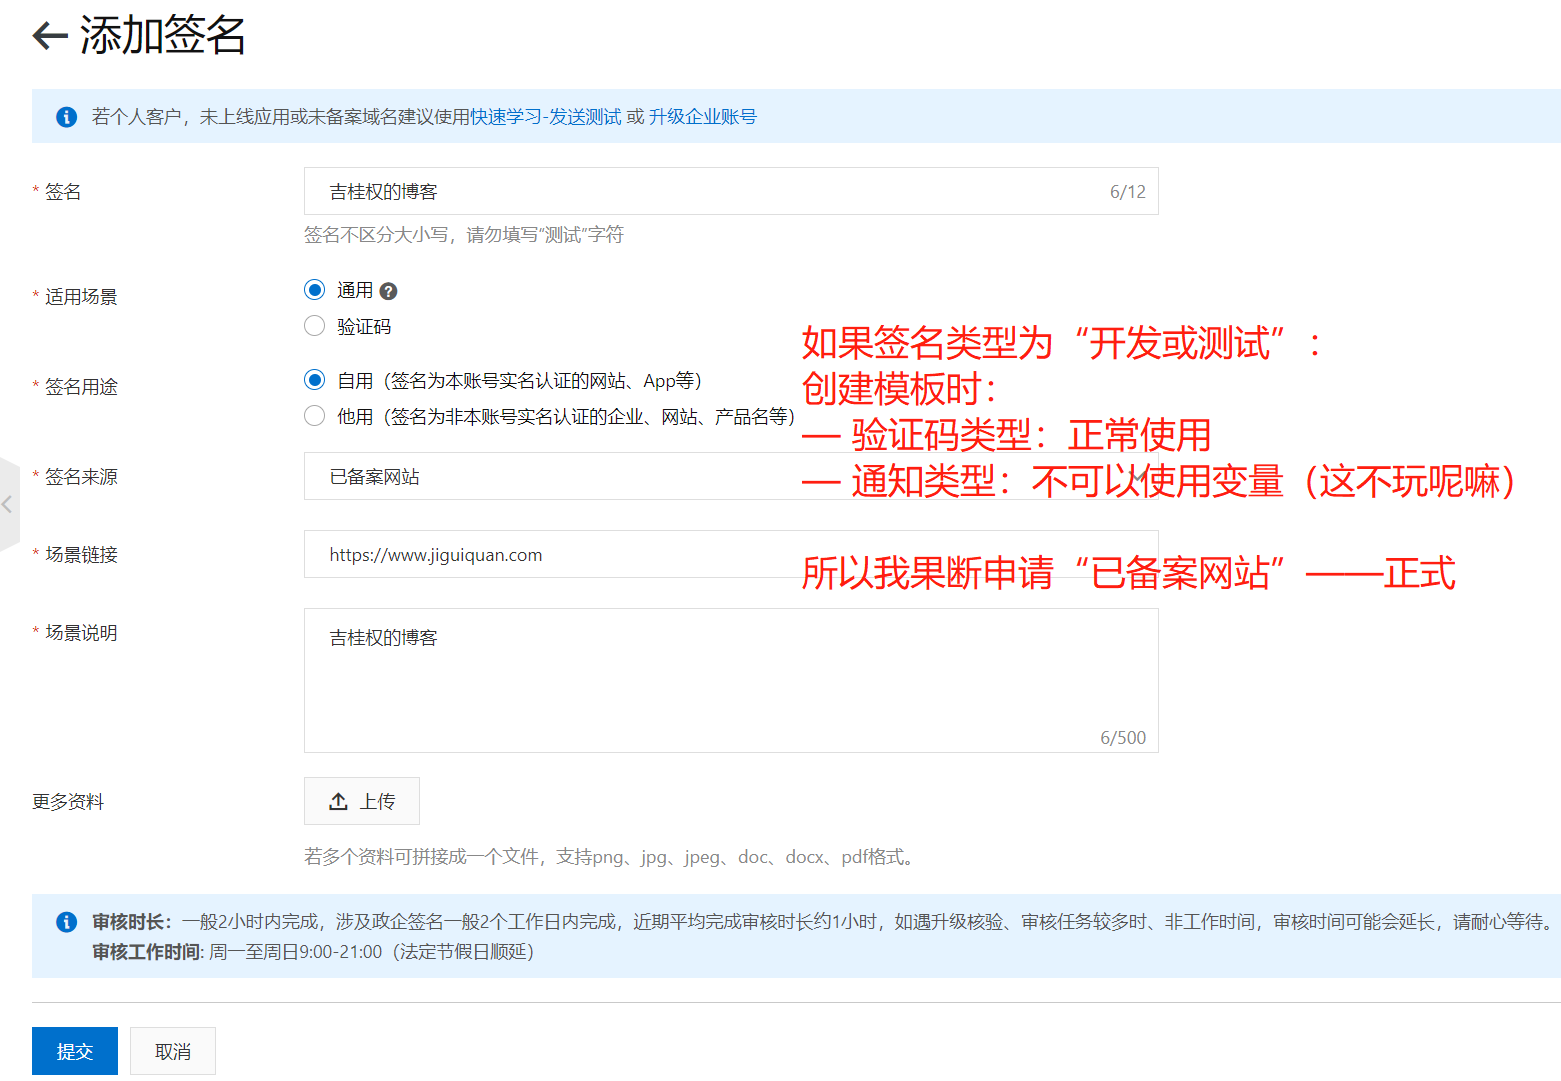
3、申请签名:
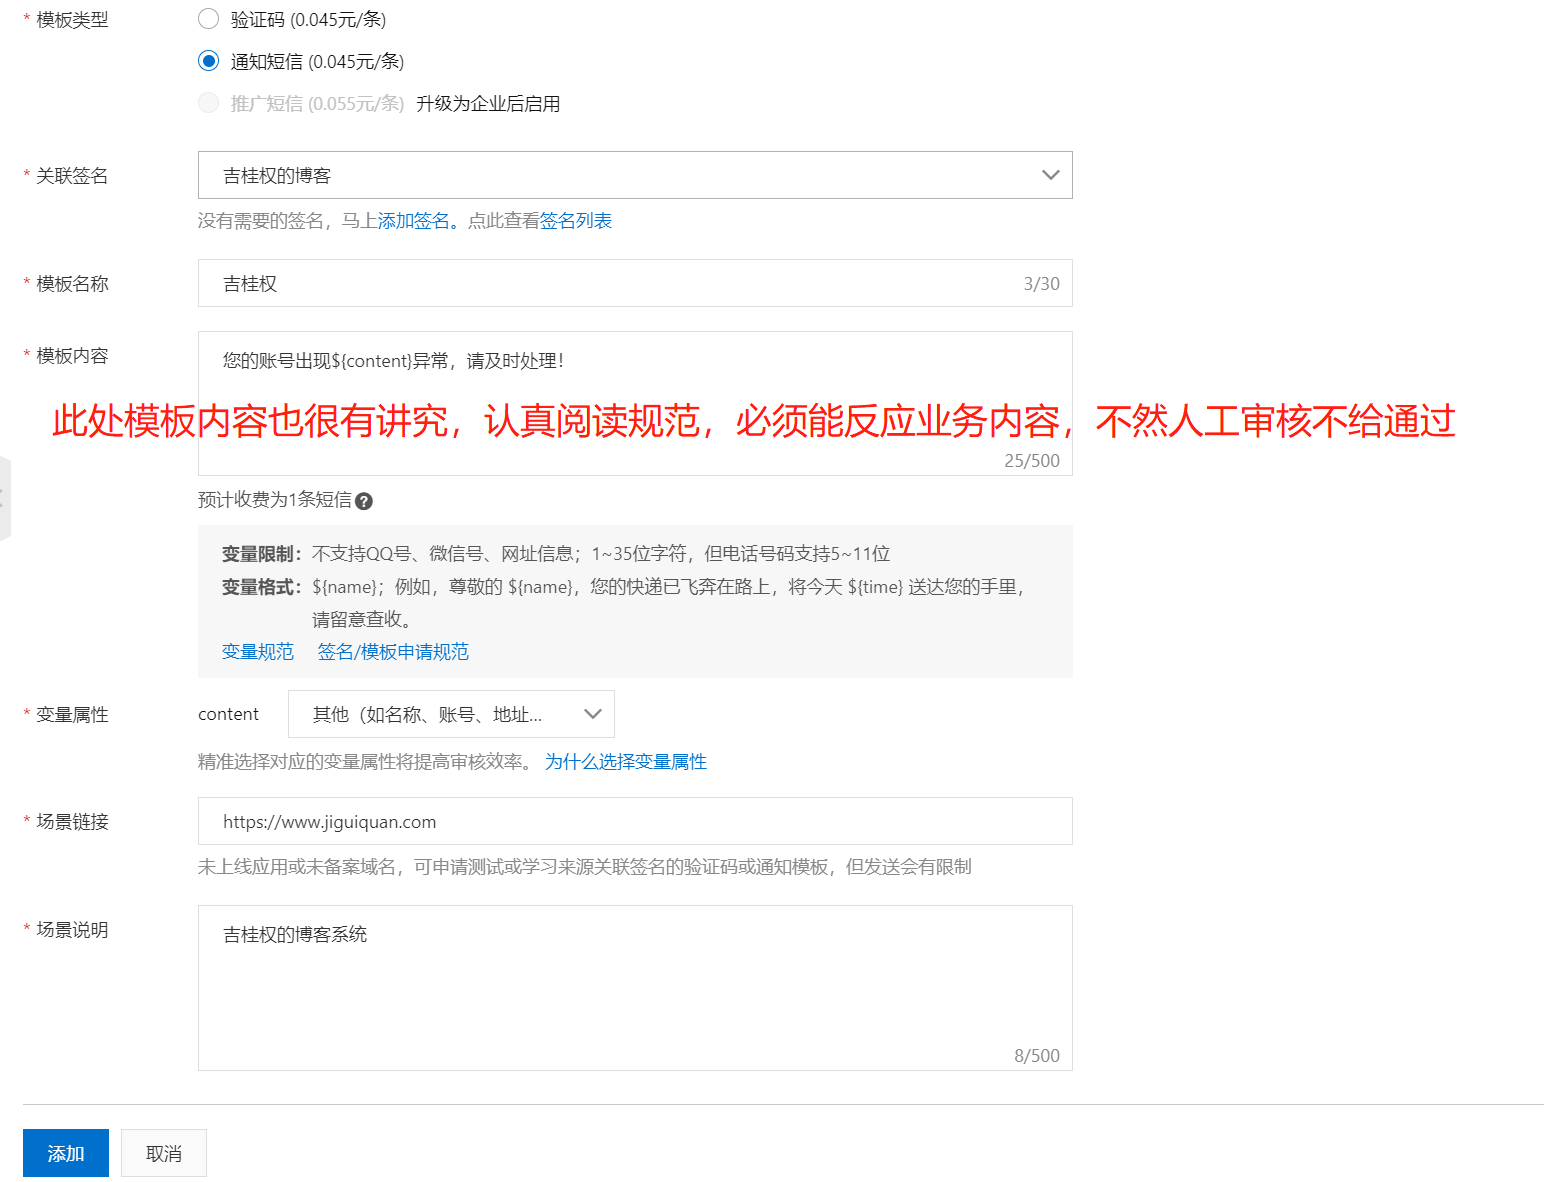
4、申请模板(签名审核通过后,才可以申请基于它的模板):
5、审核全部通过后的效果:


6、在等待审核的过程中,我们可以先去创建一个用户并申请AccessKey,用于访问控制(仅用于SMS短信服务):
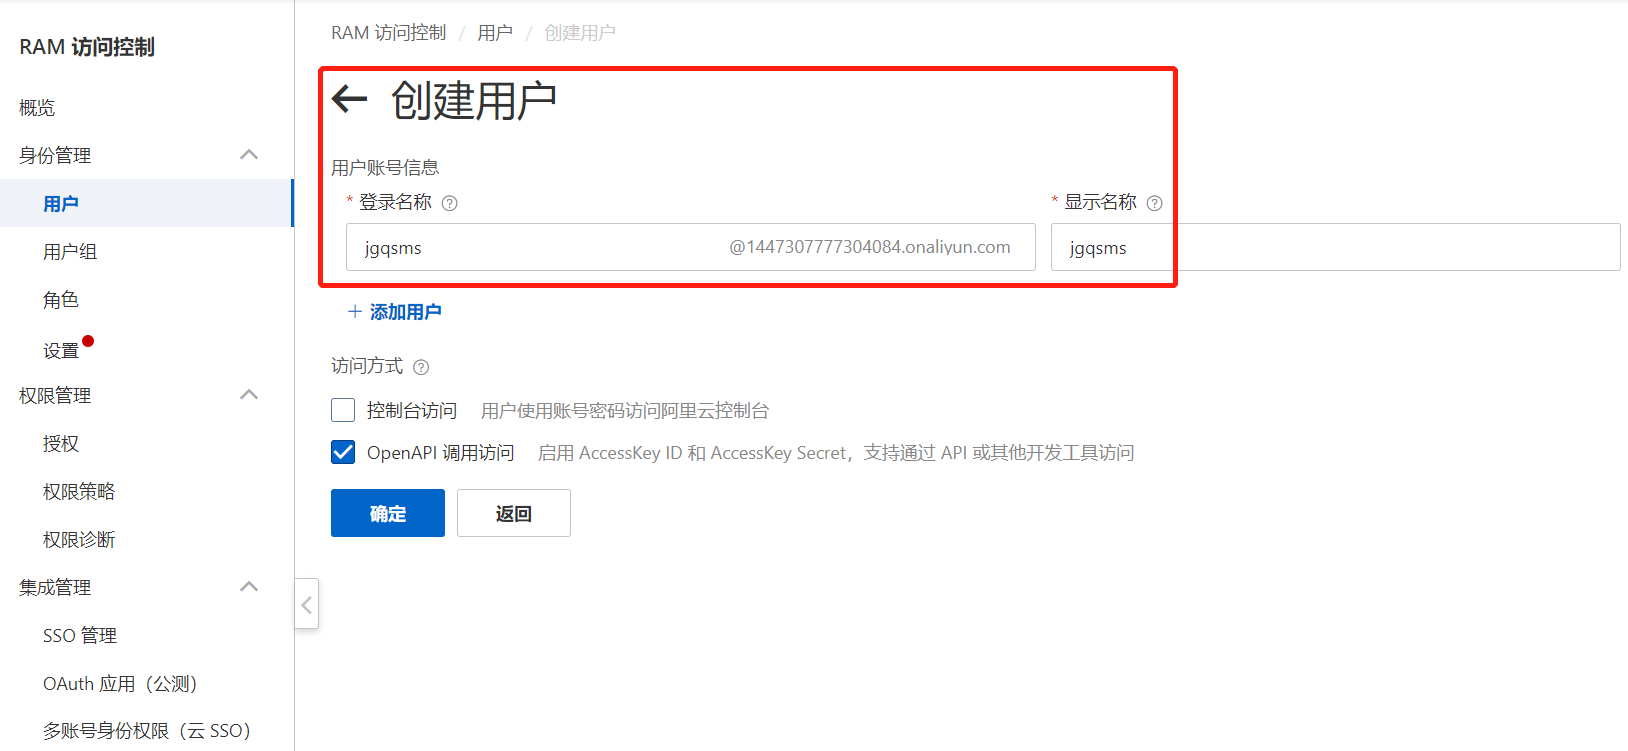
咱们只有一次机会获取到AccessKey Secret,所以一定要保存好!

为该用户添加权限:
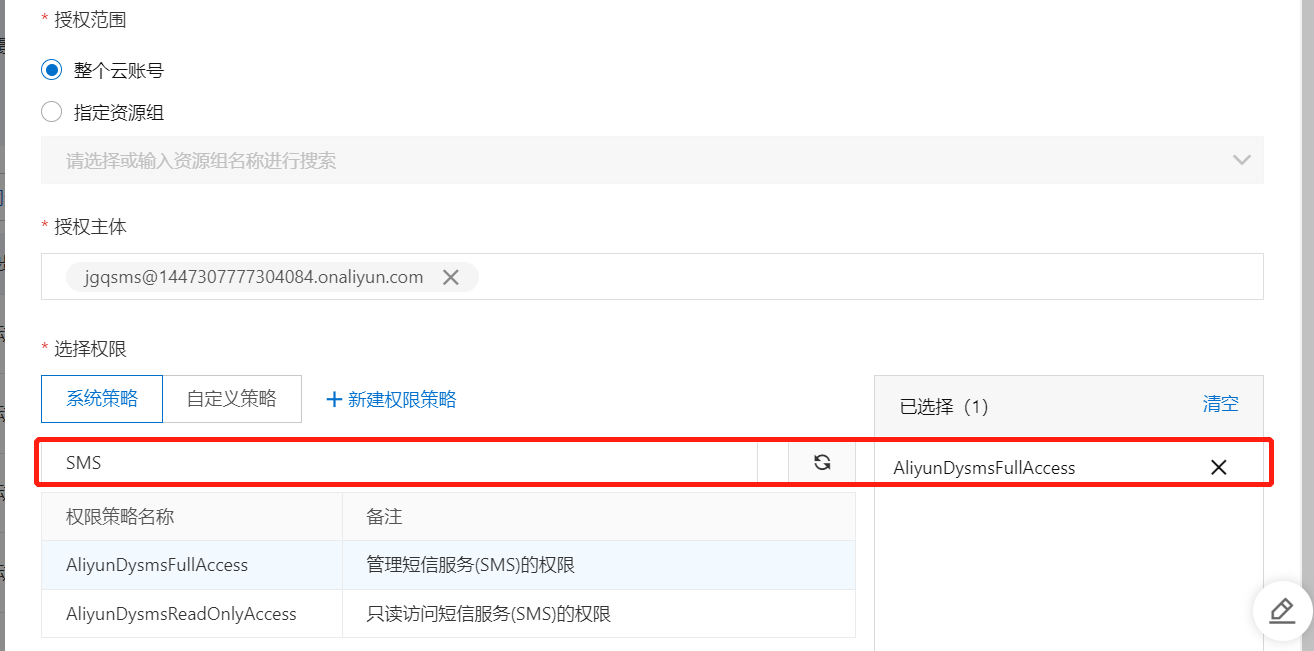
然后确认,即可完成授权配置!
二、如果审核迟迟不通过,我们也可以使用“阿里云【专用】测试签名/模板”先把开发工作推进下去:
1、先绑定自己的测试手机号:

2、选择测试用的签名/模板:

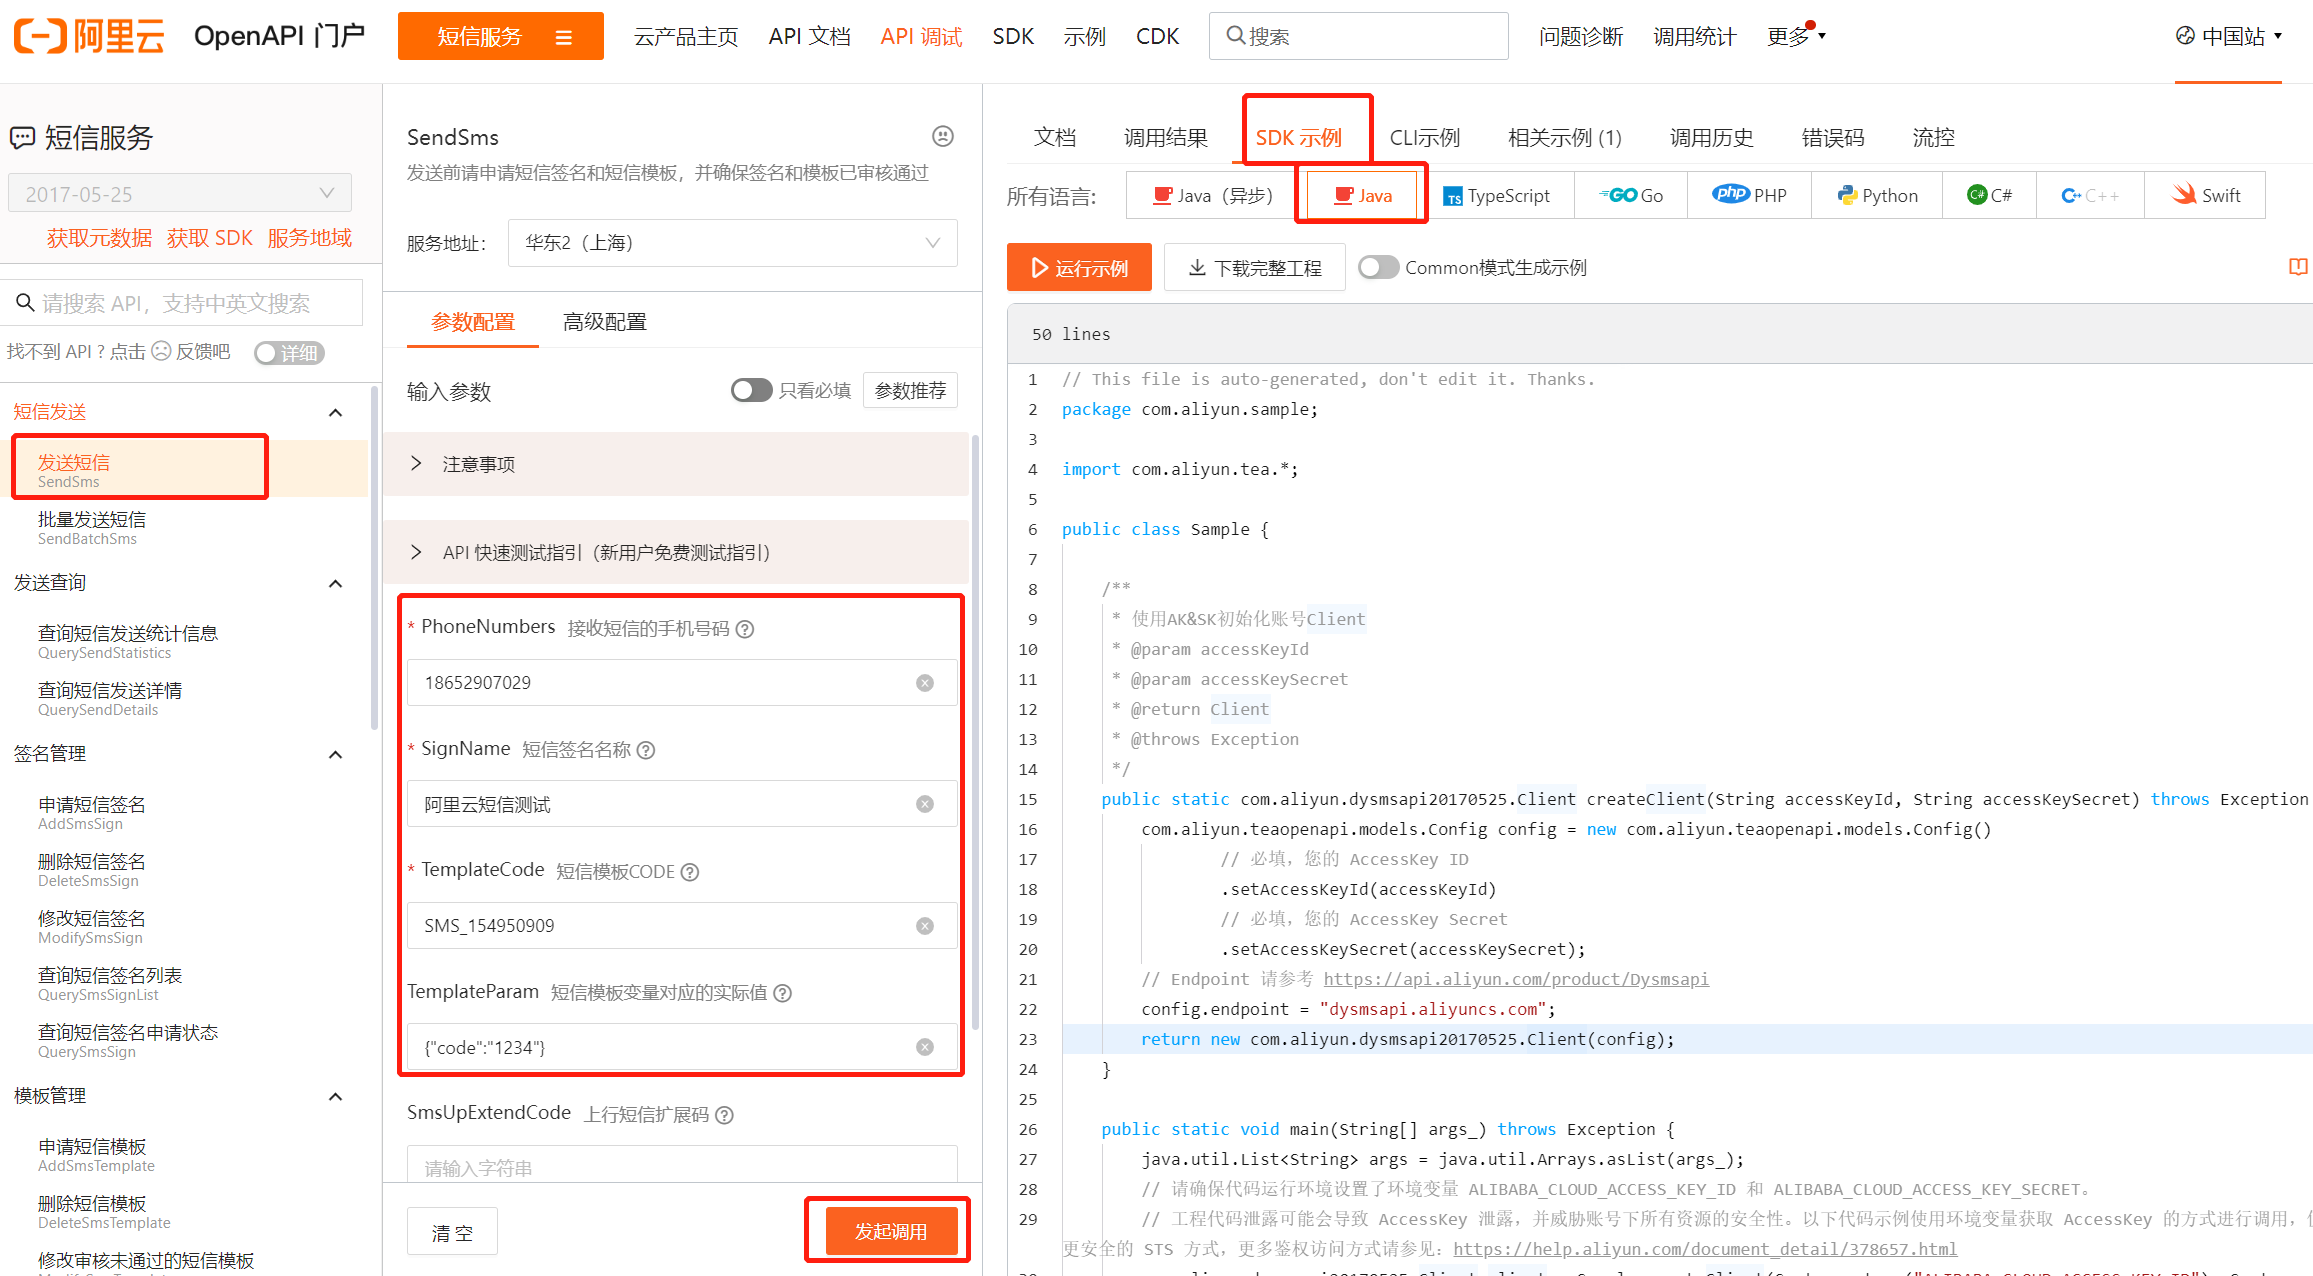
3、在OepnAPI门户网站上进行操作:
点击发起调用,我们的测试手机号就可以收到一条测试短信!
页面的右侧,就是我们对接需要的Java代码,非常方便!
三、使用Springboot对接阿里云短信服务
1、核心Maven依赖如下:
<dependencies>
    <dependency>
        <groupId>org.springframework.boot</groupId>
        <artifactId>spring-boot-starter-web</artifactId>
    </dependency>

    <dependency>
        <groupId>com.aliyun</groupId>
        <artifactId>dysmsapi20170525</artifactId>
        <version>2.0.9</version>
    </dependency>

    <dependency>
        <groupId>org.springframework.boot</groupId>
        <artifactId>spring-boot-starter-test</artifactId>
        <scope>test</scope>
    </dependency>
</dependencies>
2、首先,我先使用简单使用一个测试方法测试可行性:
package com.jiguiquan.www;

import com.aliyun.dysmsapi20170525.Client;
import com.aliyun.dysmsapi20170525.models.SendSmsRequest;
import com.aliyun.dysmsapi20170525.models.SendSmsResponse;
import com.aliyun.teaopenapi.models.Config;
import org.junit.jupiter.api.Test;
import org.springframework.boot.test.context.SpringBootTest;

@SpringBootTest
class SbAliyunSmsApplicationTests {

    public static final String accessKeyId = "LTAI5t*********79orJ";
    public static final String accesskeySecret = "lp84IqQ**********dw4QyMJ8";
    public static final String endPoint = "dysmsapi.aliyuncs.com";

    @Test
    void contextLoads() {
    }

    @Test
    public void simleSend() throws Exception {
        Config config = new Config().setAccessKeyId(accessKeyId).setAccessKeySecret(accesskeySecret).setEndpoint(endPoint);
        Client client = new Client(config);
        SendSmsRequest sendSmsRequest = new SendSmsRequest().setSignName("阿里云短信测试")
                .setTemplateCode("SMS_154950909")
                .setPhoneNumbers("18652907029")
                .setTemplateParam("{\"code\":\"4567\"}");
        SendSmsResponse sendSmsResponse = client.sendSms(sendSmsRequest);
        System.out.println(sendSmsResponse.body);
    }
}
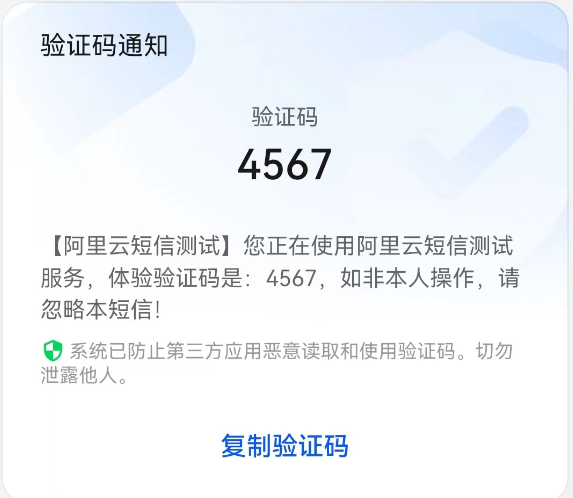
3、运行测试(可以正常收到短信):
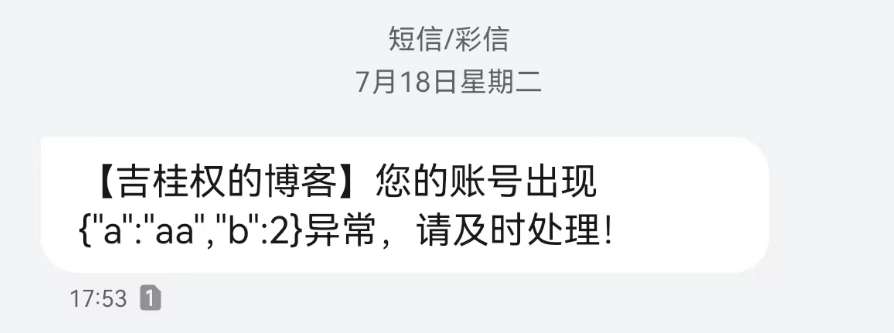
4、如果是正式的签名/模板,我们就可以收到带变量的通知短信:
